Animating a Sprite for a Game Character
Let's review the steps we've discussed doing for a video game project so far:
|
- We designed a game concept using a story board and resource hierarchy diagram to help us be creative and plan.
- We created or borrowed the artwork for our game.
- We saved our artwork as digital files on our hard drive.
- We imported those files into Flash CS3
- We created movie clip symbols for each image we wanted to be able to use in our game.
- We modified the properties for each movie clip in order for ActionScript to refer to each by name (especially giving a name to the instance name property that we wanted to use in our code).
- We exported symbols from the library and linked them to ActionScript if we wanted to use the same library symbol multiple times as different instances in our game.
- We created data structures to store our own properties for our objects within the ActionScript code.
- We attached code to the timeline for each library object we wanted to make active in our game.
|
We'll perform these steps in Flash CS3 with ActionScript 2.0 to create a walking character named Sora:
Sora is going to walk around in an adventure game. To build him, we'll borrow some artwork from Hiroshi Osaka, Sora's designer. Sora's walk sequence looks like:
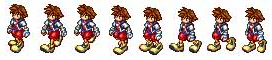
We'll break his walk sequence into eight well spaced frames and save each in a separate file - let's use the generic naming sequence sprite0.png, sprite1.png, ..., sprite7.png
You can download the eight frame files from here. Put the files on your desktop.
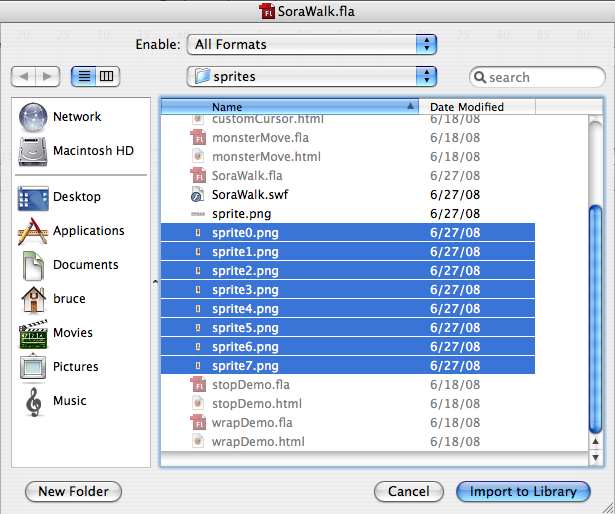
Now import all eight files into Flash using File > Import > Import to Library from the menu bar (Shortcut key: Command+R) to import all eight images into the Library. You can use the Shift key to choose the whole range of images from your file import dialog box at once (or your Command key to choose multiple that are not in a range).
We could build our walking Sora on the stage directly, but then he'd be glued to the stage instead of set up as a proper game character we can move on and off stage when we want. We'll bring each frame in separately from the library where they are all listed and available.
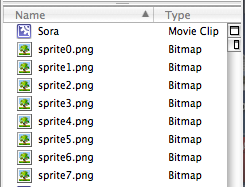
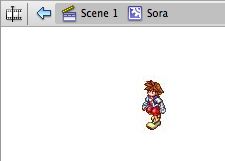
Instead, let's create a new symbol named Sora and build our animated character using that symbol. Remember that the command-F8 keyboard combination lets you create a new symbol. Name it Sora and make sure it is of type Movie Clip. Select your new symbol from the identifiers above the stage (don't choose the Stage 1 identifier by accident).
We want to bring one image into the character identified by the Sora symbol at a time. Each image will be associated with a different frame and we are in charge of deciding how many frames apart each character image should appear. If you want Sora's walk cycle to happen every second, you can set your frames per second to 8 fps (Command+J to set the fps) and put each image into an adjoining frame. But, 8 fps is quite slow for a video game's animation speed. Instead, choose a multiple of 8 - if for example, you choose 24 fps, you can then put each image into every third frame. Think about this math for a bit if you aren't sure of what's happening. Choosing the right frames in which to place your content is very important in a large project - good to practice on this small one.
As you drag each image from the library to the stage for Sora, be sure to use the Align panel (Command+K) and horizontally and vertically center the image on stage.
From the timeline for Sora, choose the right frame based on your numbering math, right-mouse click to bring up the pop-up menu, and choose Insert-Blank Key Frame to insert a new key frame into the walk animation at that frame.
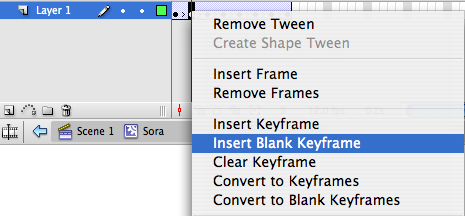
Notice that the work you did on the previous key frame disappears from the stage. You can access it by clicking on the frame in the timeline later. Drag each walk image from the Library to the appropriate new key frame you create (be sure to center align each image on the Sora stage).
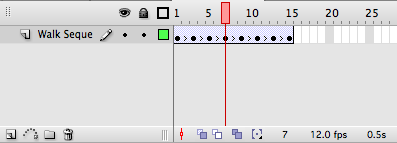
Your timeline for Sora should look like this:
We want to be able to add the Sora walk cycle to our ActionScript code using the addMovieClip() method available through the root_ object. To do that, we Export the Sora symbol to ActionScript and give the new Linkage a name.
Use the following code in the Stage 1 ActionScript in frame 1 to bring Sora to life:
init();

function init(){
  //initialization
  attachMovie("sora", "sora", 1);

  //set up direction constants
  NORTH = 0;
  NORTHEAST = 1;
  EAST = 2;
  SOUTHEAST = 3;
  SOUTH = 4;
  SOUTHWEST = 5;
  WEST = 6;
  NORTHWEST = 7;

  //randomly position sora
  sora._x = Stage.width/2;
  sora._y = Stage.height/3;
  sora.dir = EAST;
  sora._rotation = 0;
  sora.speed = 2 + Math.random() * 8;
  turn(sora);

  /* debugging code...
  trace ("dir: " + car.dir);
  trace ("rot: " + car._rotation);
  trace ("dx: " + car.dx);
  trace ("dy: " + car.dy);
  */
} // end init

sora.onEnterFrame = function(){
  checkKeys();
  turn(sora);
  move(sora);
} // end sora enterFrame

function checkKeys(){
  //check keyboard to move sora
  if (Key.isDown(Key.UP)){
    trace ("up");
    sora.speed++;
    if (sora.speed > 8){
      sora.speed = 8;
    } // end if

  } // end if

  if (Key.isDown(Key.DOWN)){
    sora.speed--;
    if (sora.speed < -3){
      sora.speed = -3;
    } // end if
  } // end if

  if (Key.isDown(Key.RIGHT)){
    sora.dir = EAST;
  } // end if

  if (Key.isDown(Key.LEFT)){
    sora.dir = WEST;
  } // end if

  if (Key.isDown(Key.PGUP)){
    sora.dir++;
    if (sora.dir > NORTHWEST){
      sora.dir = NORTH;
    } // end if
  } // end if

  if (Key.isDown(Key.PGDN)){
    sora.dir--;
    if (sora.dir < NORTH){
      sora.dir = NORTHWEST;
    } // end if
  } // end if

} // end checkKeys

function move(thing){
  //moves any thing, wrapping around boundaries

  //move
  thing._x += thing.dx;
  thing._y += thing.dy;

  //check boundaries - wrap all directions
  if (thing._x > Stage.width){
    thing._x = 0;
  } // end if

  if (thing._x < 0){
    thing._x = Stage.width;
  } // end if

  if (thing._y > Stage.height){
    thing._y = 0;
  } // end if

  if (thing._y < 0){
    thing._y = Stage.height;
  } // end if
} // end move

function turn(thing){
  //thing._rotation = thing.dir * 45;

  switch (thing.dir){
    case NORTH:
      thing.dx = 0;
      thing.dy = -1;
      break;
    case NORTHEAST:
      thing.dx = .7;
      thing.dy = -.7;
      break;
    case EAST:
      thing.dx = 1;
      thing.dy = 0;
      break;
    case SOUTHEAST:
      thing.dx = .7;
      thing.dy = .7;
      break;
    case SOUTH:
      thing.dx = 0;
      thing.dy = 1;
      break;
    case SOUTHWEST:
      thing.dx = -.7;
      thing.dy = .7;
      break;
    case WEST:
      thing.dx = -1;
      thing.dy = 0;
      break;
    case NORTHWEST:
      thing.dx = -.7;
      thing.dy = -.7;
      break;
    default:
      trace("there's a problem here...");
  } // end switch
  thing.dx *= thing.speed;
  thing.dy *= thing.speed;
} // end turn
We will go over this code together in class. The final project is available for download here.