Step 1
Create a new flash document by choosing File-New... Flash File (ActionScript 2.0) from the Flash menu bar. Press Command+J key on the keyboard (Document Properties) and set the width of your document to 500 pixels and the height to 500 pixels. Select black as the background color. Set your Flash movie's frame rate to 28 frames per second and click OK. See the board below.

Step 2
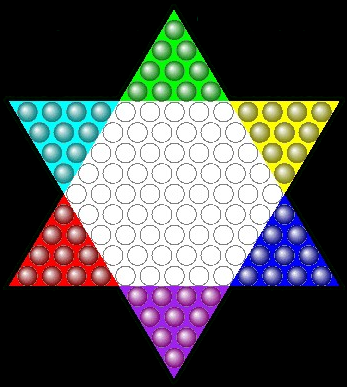
Save the Chinese Checkers board below in preparation of importing a file to your project.
Step 3
Go back into a flash stage. Choose file > Import > Import to stage (Shortcut key: Command+R) and import the into a flash stage.
Step 4
While the photo is still selected, press F8 key (Convert to Symbol) to convert this photo into a Movie Clip Symbol. Name your board ccboard.
Step 5
While the new made movie clip is still selected, go to the Align Panel (Command+K) and do the following:
1. Make sure that the Align/Distribute to Stage button is turned on,
2. Click on the Align horizontal center button and
3. Click the Align vertical center button.

Step 6
Step 6
Go back now on the main scene (rename Layer 1 main in the upper-left of the timeline panel by opening a short-cut menu and choosing Properites to change the name property), click on the first frame with your right mouse button (or Command-click if you only have one button). In the pop-up menu, choose the Action menu item at the bottom to go to the Action Script Panel. Enter the following code inside the actions panel:
init();
function init(){
// define a new array
var saying:Array = new Array();
// define values at two indexes
saying[0] = "I meant to do that.";
saying[1] = "Oh, really now.";
// iterate over the items in the array
var i:String;
for (i in myArr) {
// trace the key/value pairs
trace("key: " + i + ", value: " + myArr[i]);
}
}
_root.onMouseUp = function(){
//move the marble
//marble._x=_root._xmouse;
//marble._y=_root._ymouse;
} // end mouseUp

Step 7 Repeat the necessary steps to import the black marble image above. Use your black marble to create a symbol (F8 key) named Marble to make the marble available as an actor in your game.
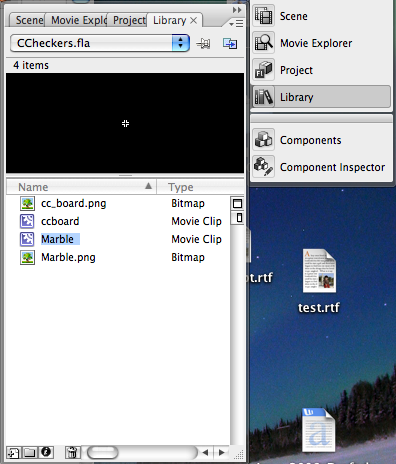
Select the Marble symbol in your symbol Library so you can see it active on the stage within Scene 1.
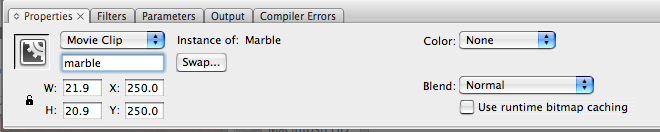
Now go back to Scene 1 and select the marble on the Stage. From the Window menu on the menu bar, choose Properties.
Change the instance name property of the marble to marble in order for it to be available to your ActionScript code as marble.
In order to use the attachMovie function that lets us create many copies of our movie clip in our game, we must give our newly created marble movie a link name and export it for ActionScript to use. To do this you will need to open up your library (Command+L or Ctrl+L on Windows) or on the top toolbar click Window and select Library. Your Library should now be displayed.

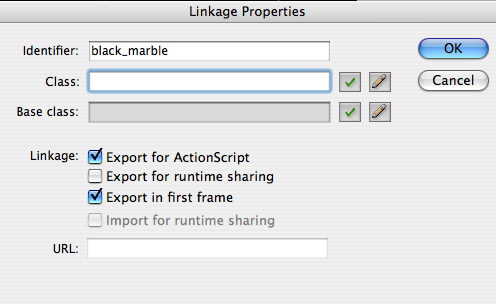
You will now notice in your library you have your marble movieclip and board. highlight the marble movie clip, right click and select Linkage. You should see a window called Linkage properties. Under the linkage setting check the "Export for ActionScript option".
You will notice it also check the "Export in first frame" option and activates the two text boxes up top. Click in the Identifier textbox and type black_marble. Click OK. Your container movieclip is now completed and ready to use with ActionScript. Please refer to the picture below to make sure you selected the correct options:
The next thing we need to do is create our multi-dimensional array that will hold all of our data which will be sent to the Marble movieclip you just exported to ActionScript. Create a new layer on your main timeline (Insert-Timeline-Layer from the menu bar) and call it Actions. Click on the actions frame in your timeline, right click and select Actions, and copy and paste the following:
//Array with all our information
black_m = [["1",250,85],["2",238,105],["3",262,105],["4",226,125],["5",250,125],["6",274,125],["7",214,145],["8",238,145],["9",262,145],["10",286,145]];
//For loop to attach our container movieclip and pass the array information
for (j=0; j<black_m.length; j++) {
//attach the marble movie clip
attachMovie("black_marble", "new"+j, j, {_x:black_m[j][1], _y:black_m[j][2]});
//set a name property
this["new"+j].name.text = black_m[j][0];
//print out details of this marble
trace("name: " + black_m[j][0] + ", x: " + black_m[j][1] + ", y: " + black_m[j][2]);
}
Publish your game and see:
It should work like this: